The most common reason to paint the Crib is when you bought a used one Or planning to use your existing Crib.
But, are you aware of what precautions you should take before Or after painting the Crib for safe sleeping?
Your cribs require proper attention when it comes to painting because it can be dangerous Or lower the shine of the Crib if you fail to take care of things.
For, e.g., using non-child-friendly paint can cause a severe skin infection, have breathing issues due to the chemical smell after painting it, etc.
Most parents don’t know how to get rid of the paint smell, brushes, the best paint, how to repaint a baby crib, etc. All these questions I’m going to answer you in this ultimate guide.
But before moving to next, Is it safe to paint a Baby Crib?
Well, In short, yes, it’s safe to paint, repaint, or change the Crib’s color. But make sure you use ZERO VOC (Non-toxic) paint for any baby furniture. Using VOC [1] paint for the Crib can cause serious issues.
According to the National Children’s Study by NCBI [2].
The health risks of VOC exposure should receive your full attention because of their ubiquitous presence, and especially during pregnancy, exposure to certain VOCs may increase the risk for birth defects.
In this article, we only focus on how to paint & repaint the baby crib?
But if you want to learn more about; which paint is safe, can you use Spray Or Chalk Paint? How much paint do you need? Then I recommend reading our ultimate guide: Can You Paint a Baby Crib?
I hope you read it to make sure you are doing the right thing for your baby. So stay tuned with me to learn how to safely paint a crib?
How to Paint a Crib Properly & Safely?
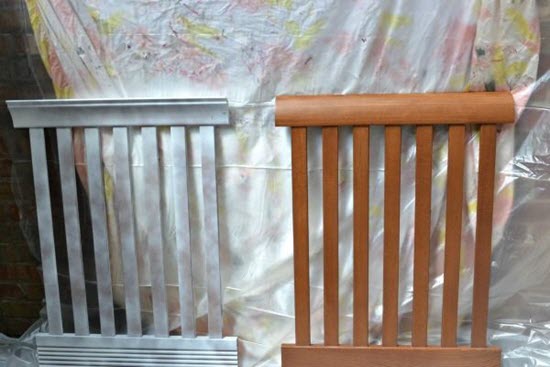
Almost everyone enjoys painting a baby crib because it’s something everyone can do, even at home. Painting a Crib is just a four steps process. Starts by understanding the Crib, then preparing the Materials & Crib to paint; after that, apply the paint & let it dry.
Let explore each step one by one to safely paint a crib.
Step 1:- Start By Understanding Your Crib
Before you paint the Crib, first understand its parts, which one you can paint & which one not. For, e.g., additional accessories, Bottom legs, Rods, Side Lock, Wheel, etc.

Every Crib varies in its designs & quality; some are made of hard plastic that you can’t be painted. But if it is made up of wood, then feel free to go ahead.
There is also a possibility that you bought a crib that cannot be disassembled. In that case, you would have to paint it as a whole.
Note: Must always follow the manufacturer’s recommendations. They made it clear which type of material was used to manufacture it & can you dismantle it or not.
The Crib shape can also put your painting skills in a problem. The distance between each rod can increase this difficulty. If they are too close, then moving the brush inside or between can put you in trouble.
And if the rod is rectangular, then perfectly covering the corners is an art!
Step 2: Prepare The Materials for Paint
Now, you know which part of the Crib needs to be painted. So, it’s time to collect the material you need.
So, only choose baby skin-friendly paint, don’t choose any paint because that contains VOC.
While decorating your baby’s nursery, you have to consider how delicate your little one is! Any wrong in the selection of paint can cause significant damage to your baby’s health.
Here is the list of the material you need to paint the Crib safely & adequately.
- Renaissance Furniture Or Rust-Oleum Interior baby safe paint for Crib
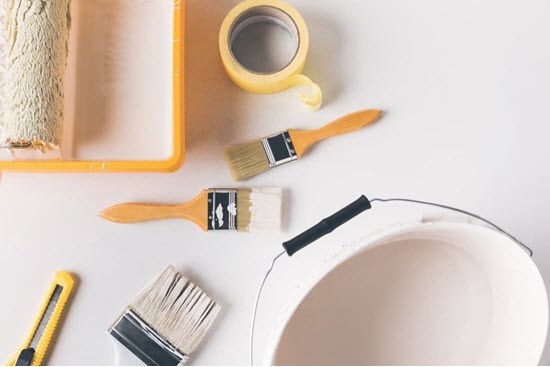
- Paint Brushes for Crib
- Newspaper to protect your floor from stains
- Grit Sanding Paper to remove dirt from it
- Cleaning Vinegar & Spray Bottle ( Optional )
- Dry Cloth to clean the Crib
- Wood Filler Or Wood Wax, Stain Blocking Primer ( to repair the crack or tooth marks )

Now the next question you may ask is, how much paint do I need for my Crib? Well, to get the answer to watch this quick video
So you have the material you need to paint, the quantity of paint, and already know which part of the Crib needs to be painted. So, now let’s prepare the Crib for painting.
Step 3: Prepare Your Crib for Paint:-
Before you start painting the Crib, you need to place something under the Crib (on the floor) like a Newspaper to ensure you do not stain your floor while painting. After that, dismantle all the parts of the Crib if possible.
Is it important to do sanding? Can I paint my Crib without sanding it or not? The answer to this question is, Partially No, Because you will not get the smoothness, finishing & result you are looking for without sanding the crib surface.
So I strongly recommend using Grit Sandpaper before painting the Crib.
Now, the next question is; How to fix chipped paint on Crib?
Well, If there is any Crack, Chipped, Or have cute tooth marks on it, which is very common in Old Crib. Then you can fix that with Wood Filler Or Wood Wax.

Just apply the Filler or Wax on the Chipped wood and let it dry. Don’t forget to apply stain blocking primer on it after sanding and scuffing it again. Otherwise, crib paint becomes dull or cracked again from that spot after some time.
Note:- You don’t need to apply primer on all the parts if you are not repainting the same paint. You need it only when you are changing the color of the Crib.
Now, all the things are done. So it’s time to remove the dust from the Crib before applying the layer of paint to it.
Make a mixture of water & Cleaning Vinegar; add in the Spray Bottle to apply and use Dry Cloth to dry it. You can also use a wet cloth to clean the Crib. But I recommend the Vinegar mixture because it kills all the germs & lowers the paint smell.
Any dust or dirt that remains on the Crib can lead to not desired results, so clean it properly to get excellent finishing.
Step 4: Apply the Paint on Crib & Let it Dry:-
Now your Crib is ready to apply the baby paint on it. But before using paint on it, ask yourself one more question, are you Repainting your Crib with the same color or different color.

If you are planning to change the color of the Crib, then you need to apply two coats of paint. But if you have the same color, then one thick layer is sufficient to give it a new look.
So, apply the first top coat of the paint & let it dry for some time before heading towards the second coat. A top coat will be the base of your color.
The important thing to keep in mind while applying the second layer is that, must have to spread the paint evenly all over the Crib to maintain finishing.
Note: Allow your first layer to dry completely & trust me, you will be satisfied with the final results. Otherwise, you would keep on messing with layers.
Once the paint dries off completely, your Crib is ready to get assembled again. Place the mattress, sheet, and hanging toy in it to keep your baby entertained while you are doing work.
Want to see how the process works. check the below video.
Painting is an art, and different people use different ways to paint it.
Well, it totally depends on you which method do you want to use. Some use a brush, whereas someone likes to use Spray. Just keep in mind, always use child-friendly paint.
If you plan to use spray paint, watch this video; How to spray paint a crib? This video helps you to apply paint properly over the surface of the Crib.
Also, if you are like my friend who likes Chalk Paint. The benefits of using Chalk Paint, it’s a water-based paint with ZERO VOC; in short, it’s the best for a baby product.
Watch the below video to understand; how to paint a crib with chalk paint?
So this is the best way to paint a crib. I hope you like our guide and found it informative that it helps you do things properly.
Now, what next? Here are a few essential guidelines that help you to take care of your newborn baby.
- How to Make a Crib More Comfortable?
- How To Keep Crib Warm In Winter?
- How to Transition from Bassinet to Crib?
Now, it’s your turn. Let me know what you think? What else do you do while painting your baby crib? Put your valuable comment and feedback in the comment box to help other moms like you make a quick decision.
Don’t forget to share the guide because sharing is caring.

Dr. Sakshi Patel
Senior Content Writer
Dr. Sakshi Patel, an expert in Human Development and Family Studies, combines her academic knowledge with personal experience as a mother to twins. She provides comprehensive articles and meticulous reviews on baby essentials, offering accurate and up-to-date information to help parents make informed decisions. Read more.


